
FILE SETUP
Printing your Products can sometime require a good amount of knowledge to effectively get what you want as a finished product. We’re compiling a host of information here to help that experience be fruitful for you! We’ll be constantly adding to this FAQ, so check back if you need something answered. If you don’t see your answer here, feel free to email us at orders@artistexpress.net and we can help answer your questions and build this knowledgebase!
Color Mode Best Suited for Printing
For best color results, please send us your artwork in CMYK color space. We can still accept RGB files, however there is no guarantee on how the colors will turn out in print. Usually RGB prints a bit darker than what is seen on screen.
Click on the images below to zoom in and see the differences in quality.
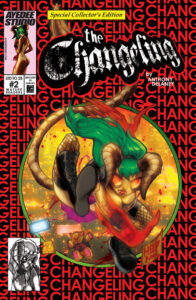
CMYK color space provides the most accurate color matching to your original artwork, and is recommended for printing. If you are converting your artwork from RGB to CMYK, the colors will mute, and color correction at this point will be recommended so you can get the best intended values that will in turn match in print.
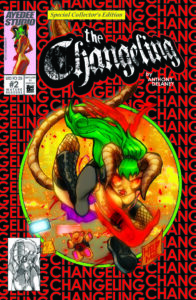
RGB color space provides richer colors and a wider color gamut, but they don’t always translate accurately in print. RGB files tend to print darker and muddier, so gradients and nearest neighbor values can get lost in print. RGB is best for digital artwork meant to be viewed on a screen.
Image Resolution Best Suited for Printing
For best results, and to avoid any pixelation of your artwork in print, please send us files at a minimum of 300DPI. Anything under that could result in diminished print quality.
Click on the images below to zoom in and see the differences in quality.
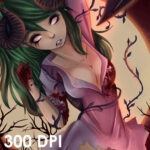
Image Printed at 300 DPI. This image will print with optimal print quality and no pixelation
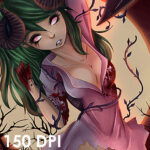
Image Printed at 150 DPI. Here you can see the degradation of both the line art and color clarity with pixelation being apparent.
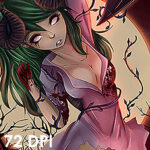
Image Printed at 72DPI. The quality is trashed, with pixelation and a haloing effect around some art elements. This is the equivalent of saving a file directly from a search engine and running it on the printer, which is strongly disadvised.
File Formats Acceptable for Printing
For posters, cards, or any flat printable items, please send them as either JPG, PNG, TIFF, or PDF. Note: PNG files only print in RGB color space.
For books, PDFs are STRONGLY preferred. Please send books in the following way:
- Covers – Please send one PDF containing the Cover (First PDF page), Inside Front Cover (Second PDF page), Inside Back Cover (Third PDF page) and Back Cover (Fourth PDF page). Note: If you have variant covers for your book, send EACH cover PDF with these 4 pages in it.
- Interiors – Please send one PDF containing all Interior pages (pages, not spreads) in their intended order.
If you prefer to send them as JPGs, PNGs or TIFFs, be sure to explicitly name each file so there is no confusion. Example:
- Cover – Cover.jpg
- Back Cover – Back Cover.jpg
- Inside Front Cover – Inside Front Cover.jpg
- Inside Back Cover – Inside Back Cover.jpg
- Interior Pages – Page 1.jpg; Page 2.jpg; Page 3.jpg etc.
For Stitched books, page counts MUST be a multiple of 4. Each sheet they are printed on contains 4 pages of the book, and having an odd number of pages will leave undesired blank white pages in your book.
WHITE TONER/SPOT FOIL SETUP
The White Toner/Spot Foil finish is used to mask select areas of your artwork with White Toner to allow Holofoil, Metallic or colored stocks to shine through in only areas you want them to. ArtistExpress requires a PSD or layered file from your design program for all artwork using White Toner/Spot Foil.
Set up the PSD with two layers: one for the White Toner mask and one with the Base Artwork underneath it. The Base Artwork layer will contain your entire unaltered composition. The White Toner layer will be where you will draw the areas the White Toner will be applied to the artwork. The areas NOT drawn on this layer will be where the Holofoil/Metallic/Colored areas will show through. Draw this layer in a single solid color. Make sure this artwork has been correctly sized using or matching the guidelines from our Templates. We will use this layered file to set up the file to print.
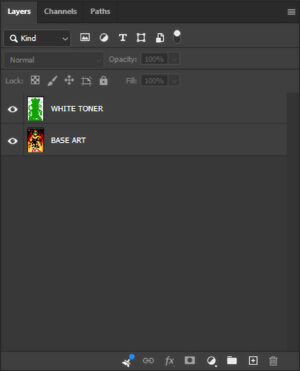
Set up the PSD with two layers: one for the White Toner mask and one with the Base Artwork underneath it. The Base Artwork layer will contain your entire unaltered composition. The White Toner layer will be where you will draw the areas the White Toner will be applied to the artwork. The areas NOT drawn on this layer will be where the Holofoil/Metallic/Colored areas will show through. Draw this layer in a single solid color.
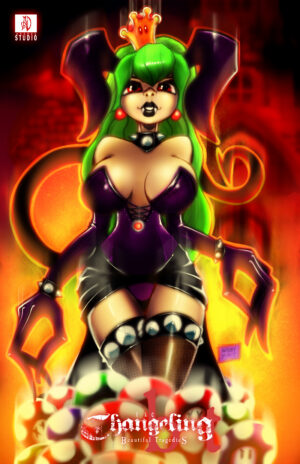
This will be the Base Art used for this example. No alterations are necessary, as the Holofoil/Metallic/colored areas will be controlled with the White Toner layer.

This is an example of what the White Toner layer should look like. In this example, we will be adding White Toner behind the subject, signature and the corner logo. The book title was omitted to have the Holofoil/Metallic/colored stock show through as a design preference.
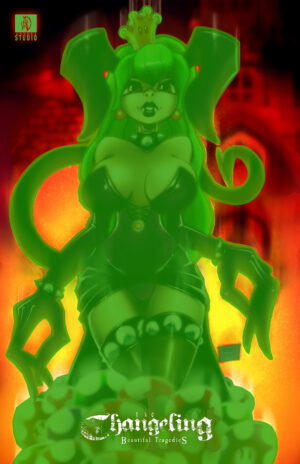
Here is a composite of the White Toner layer over the Base Art layer. The areas in green will have White Toner printed behind them.
This is the finished result, following this tutorial and placement of the White Toner. You’ll notice where the Holofoil shows through, and where the White Toner prevents it from doing so.
CARDSTOCK SPOT EMBOSSING SETUP
The Spot Embossing finish is used to apply an Embossed texture to select areas of your artwork on our Cardstock products. ArtistExpress requires a PSD or layered file from your design program for all artwork using Spot Embossing.
Set up the PSD with two layers: one for the Emboss areas and one with the Base Artwork underneath it. The Base Artwork layer will contain your entire unaltered composition. The Emboss layer will be where you will draw the areas the Emboss will be applied to the artwork. Embossing for Cardstock is binary, so areas to be Embossed cannot have gradients or transparencies. The rule of thumb for Embossing on Cardstock is ‘Less Is More’. It’s best to break up the Embossed areas into smaller items and areas, such as jewelry, clothing, hair, lips, logos etc. Having large areas of Embossing will cause defects and will also not be aesthetically pleasing. Draw this layer in a single solid color. Make sure this artwork has been correctly sized using or matching the guidelines from our Templates. We will use this layered file to set up the file to print.
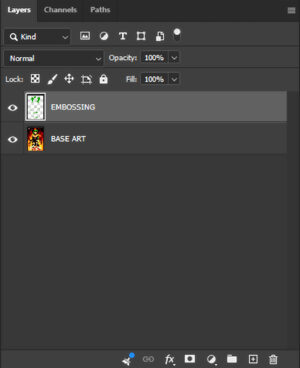
Set up the PSD with two layers: one for the Emboss areas and one with the Base Artwork underneath it. The Base Artwork layer will contain your entire unaltered composition. The Emboss layer will be where you will draw the areas the Emboss will be applied to the artwork. The rule of thumb for Embossing on Cardstock is ‘Less Is More’. It’s best to break up the Embossed areas into smaller items and areas, such as jewelry, clothing, hair, lips, logos etc. Having large areas of Embossing will cause defects and will also not be aesthetically pleasing. Draw this layer in a single solid color.
This will be the Base Art used for this example. No alterations are necessary, as the Embossed areas will be controlled with the Emboss layer.

This is an example of what the Emboss layer should look like. In this example, we will be adding Spot Embossing to the horns, crown, spikes and jewelry of the subject, as well as to the book title and the corner logo.
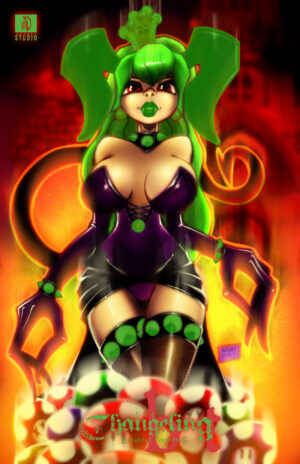
Here is a composite of the Emboss layer over the Base Art layer. The areas in green will have Spot Embossing applied to them.
METAL SPOT EMBOSSING SETUP
The Spot Embossing finish is used to apply an Embossed texture to select areas of your artwork for our Metal Products. Spot Embossing for Metal is different than Cardstock as it is a different method of artistically applying the Emboss effect. ArtistExpress requires a PSD or layered file from your design program for all artwork using Spot Embossing.
Set up the PSD with two layers: one for the Emboss areas and one with the Base Artwork underneath it. The Base Artwork layer will contain your entire unaltered composition. The Emboss layer will be where you will draw the areas the Emboss will be applied to the artwork. For Metal Embossing (unlike Cardstock), gradients, transparencies and larger areas of coverage are available. Draw this layer or pull your callouts in a single solid color, preferably Black (#000000). The more opaque the area is, the more the Emboss effect will be raised. Make sure this artwork has been correctly sized using or matching the guidelines from our Templates. We will use this layered file to set up the file to print.
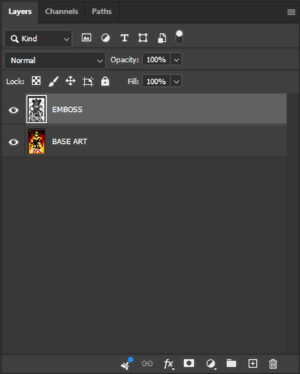
Set up the PSD with two layers: one for the Emboss areas and one with the Base Artwork underneath it. The Base Artwork layer will contain your entire unaltered composition. The Emboss layer will be where you will draw the areas the Emboss will be applied to the artwork. For Metal Embossing (unlike Cardstock), gradients, transparencies and larger areas of coverage are available. Draw this layer or pull your callouts in a single solid color, preferably Black (#000000). The more opaque the area is, the more the Emboss effect will be raised.
This will be the Base Art used for this example. No alterations are necessary, as the Embossed areas will be controlled with the Emboss layer.

This is an example of what the Emboss layer should look like. In this example, you can see the variation in opacity that helps shape the dimensional feel of the artwork.
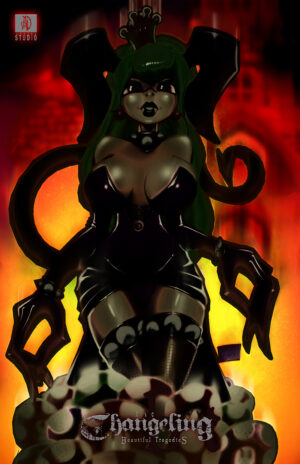
Here is a composite of the Emboss layer over the Base Art layer. The darker areas will have Spot Embossing applied to them.