PROOFING
Printing your Products can sometime require a good amount of knowledge to effectively get what you want as a finished product. We’re compiling a host of information here to help that experience be fruitful for you! We’ll be constantly adding to this FAQ, so check back if you need something answered. If you don’t see your answer here, feel free to email us at orders@artistexpress.net and we can help answer your questions and build this knowledgebase!
Receiving Your Proofs
ArtistExpress uses Ziflow for our Proofing process. We will send proofs only after all files for your order are received and the invoice is paid. Be sure to whitelist Ziflow.io and ArtistExpress.net to make sure you don’t miss your Proofs.
We take the files you submit, arrange them and get them made into print ready files and then share them with you to approve via the Proofing process. When Proofs are sent, they will be sent to the email used to place the order. We can also send them to any collaborators you want us to, provided you also include their emails.
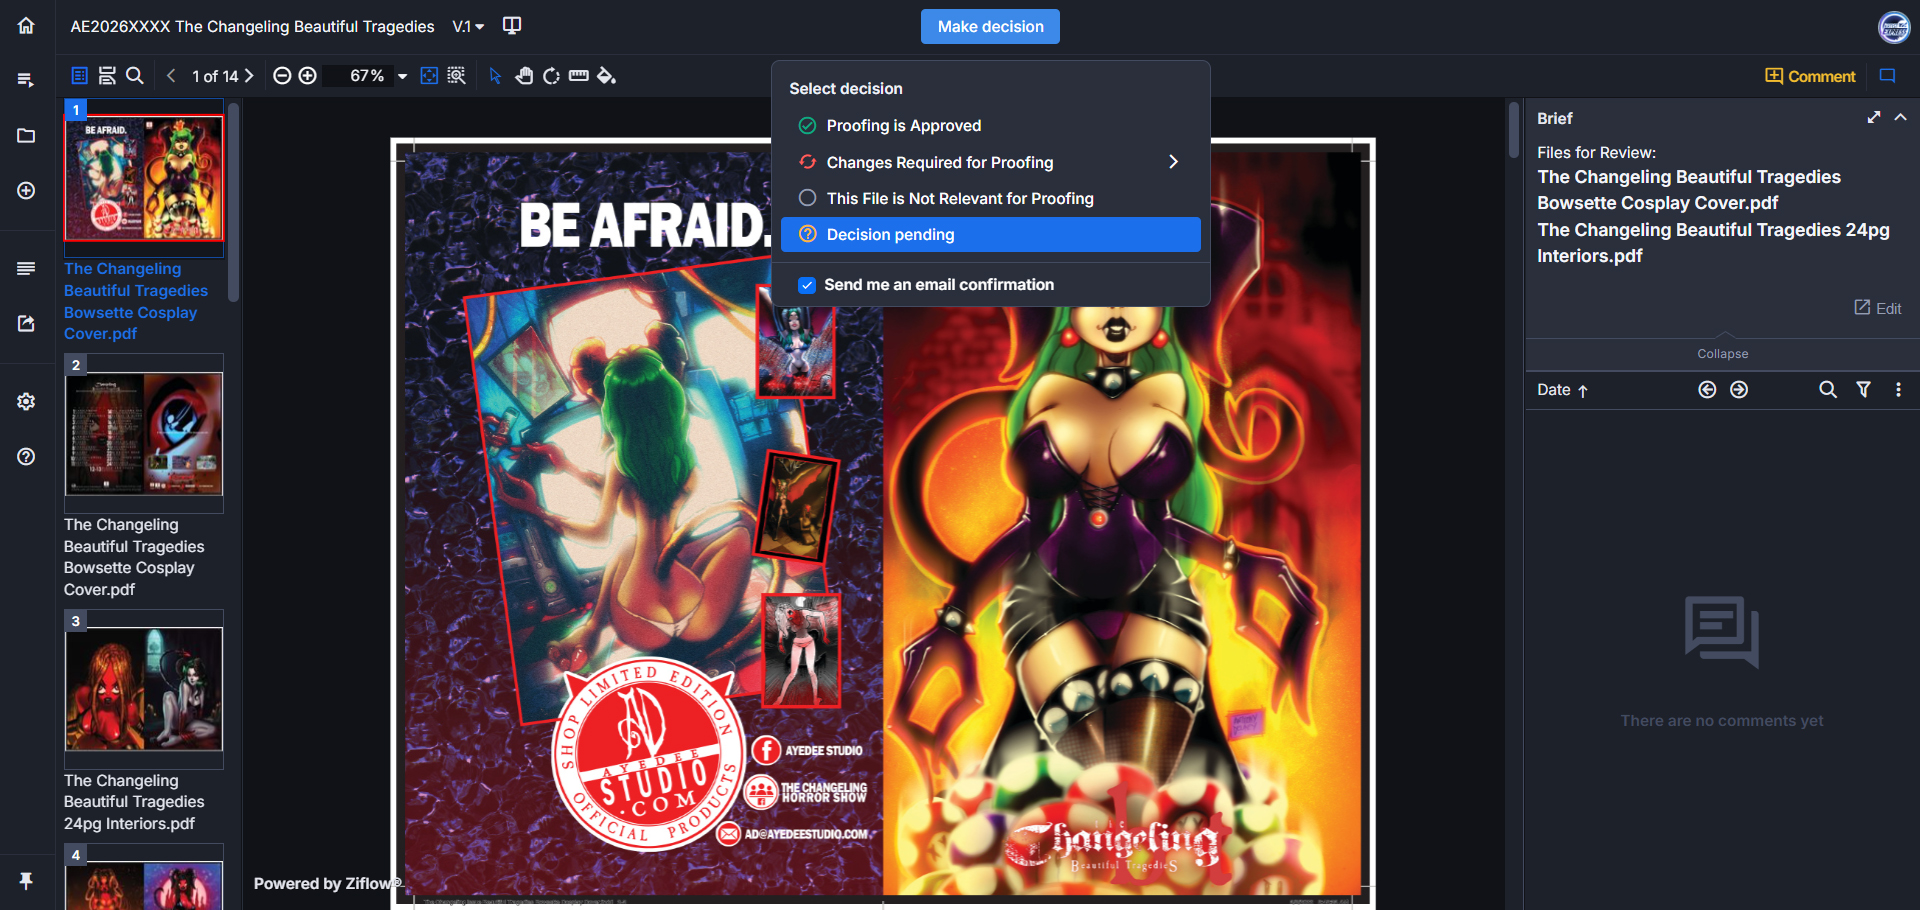
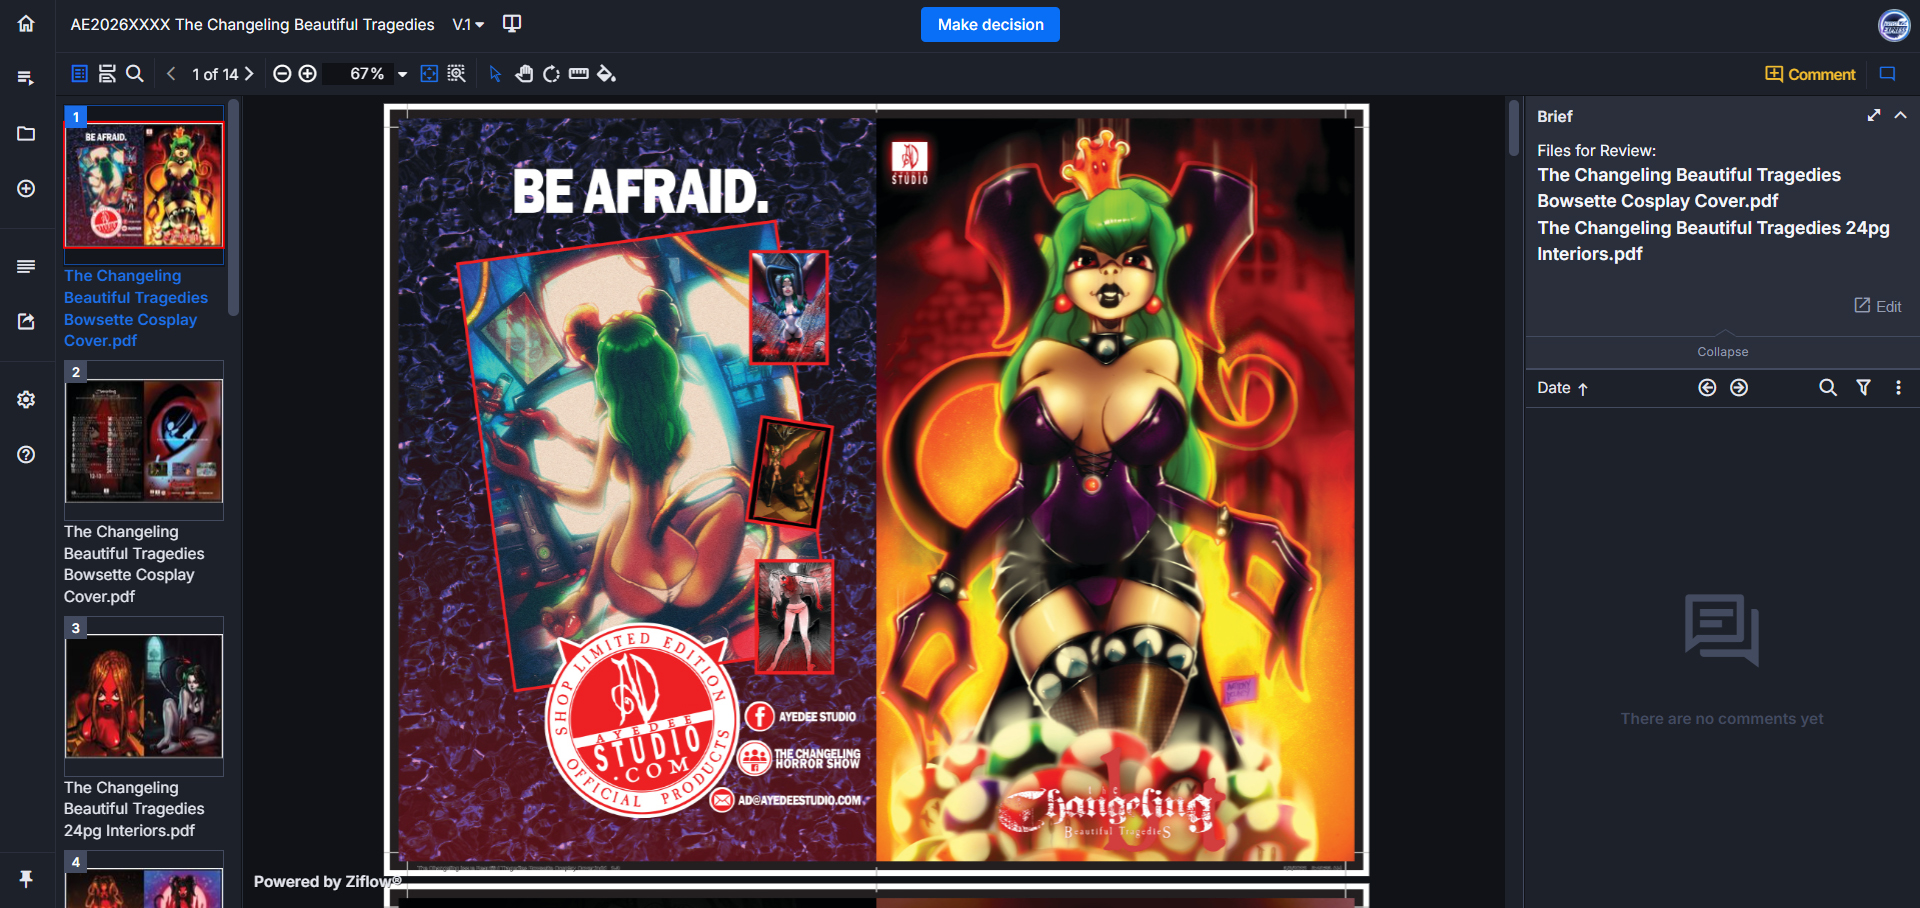
All of the files to review will be listed in the ‘Brief’ section, and will also include any notes relevant to the work done to get your files print ready. These notes may include how we resized artwork, arranged page order, proactive measures we may have taken to make your work print better and more.
Thumbnails for each file are provided, and will match the order of the listed files in the ‘Brief’ section. Use these Proofs to check for proper layout, numbering, color, sizing and anything else you may have concerns with regarding the quality of your printed product.
ReADING Your Proofs
Your artwork, once set up to print, will be sent back to you to Proof with all of the necessary marks to ensure it prints and is produced properly. To understand what these marks mean, let’s explain them one by one.
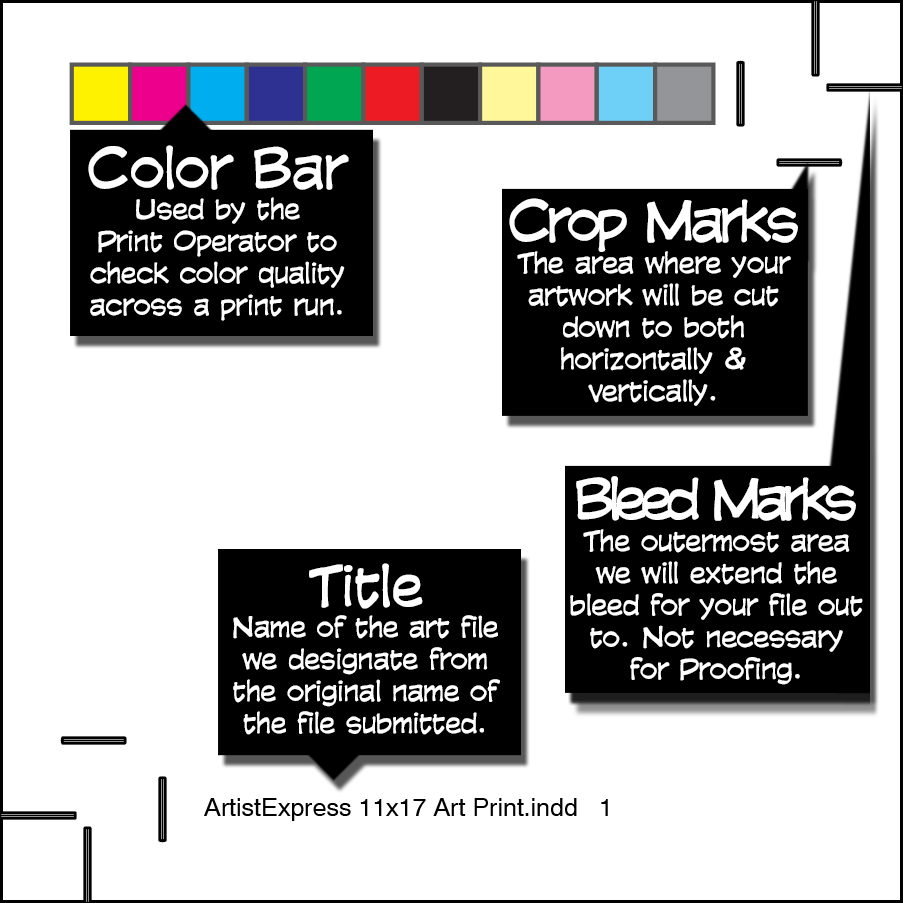
- Title
This is the name of the art file we designate based off of the original name for the file you submitted. If you have multiple variant covers for your project, it is imperative the names of the files are uniquely identifiable.
For non-Book items, we standardize it by naming the file starting with your name, the size and type of item, specialty stock type, the name originally submitted for this file and if applicable, if the file is numbered.
For Book Covers, we standardize it by naming the file starting with the book name, issue number, book size (if anything other than comic book size), specialty stock type, the name originally submitted for this file and if applicable, if the file is numbered.
For Book Interiors, we standardize it by naming the file starting with the book name, issue number, interior page count, book size (if anything other than comic book size) and the name originally submitted for this file. - Crop Marks
Crop Marks are placed in the area where your artwork will be cut down both horizontally and vertically. If you use our Templates, these marks will be in the same position as the position in-between the Margin and Bleed area. You can zoom in and use these Crop Marks to check if any unwanted elements of your work extend past them. - Bleed Marks
Bleed marks aren’t necessary for you to check against anything regarding your proofs. They merely indicate the outermost area a file’s Bleed could be extended to. - Color Bar
Color Bars are used to ensure color quality matches and is consistent throughout a print run by the Print Operator. If the color in these bars shifts from sheet to sheet, it is indicative of either maintenance or adjustments needing to be done for the print run. This allows us to make sure your files maintain color consistency throughout.
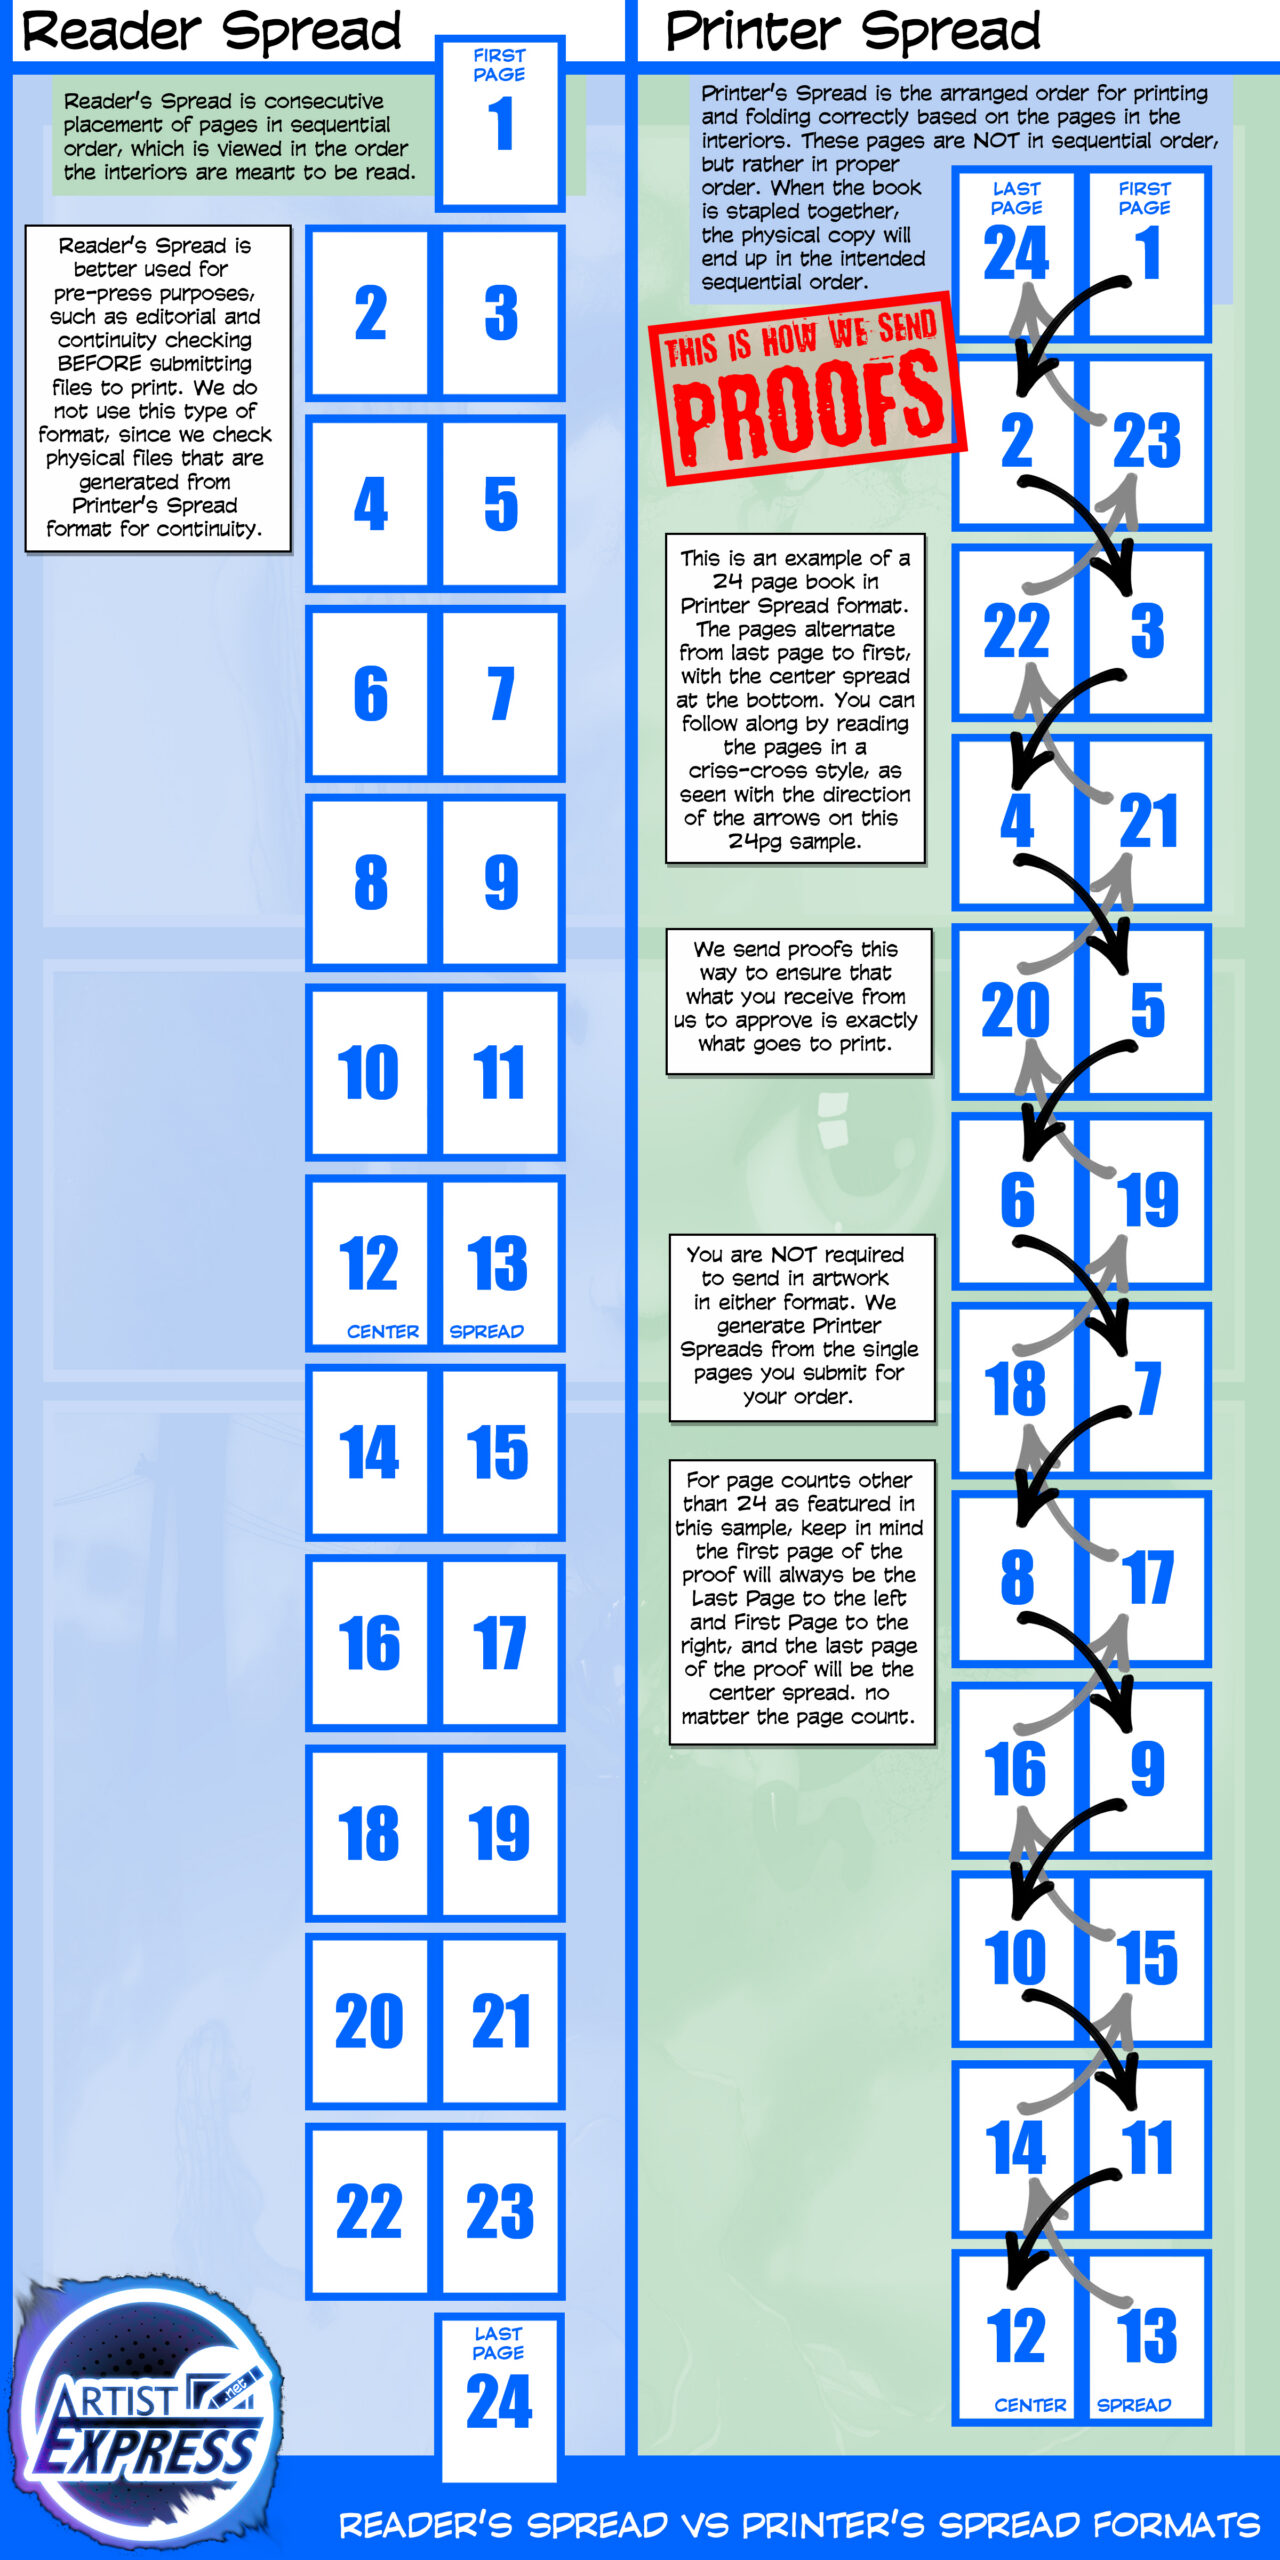
How to Read Proofs for Stapled Books
Proofing can be a bit confusing to understand for first timers and even veterans when it comes to pagination for Stapled Books. Proofs can easily be looked at as being out of order upon first glance, but we assure you what we send is intentional, and a standard method for this type of printing!
Proofs are sent in Printer Spread format. Pages in the PDF will criss-cross alternating from the First Page on the right, looping around the Center Spread, and then back up to the Last Page on the Left. When the book is physically produced, these criss-crossed pages will end up in proper sequential format (Pg. 1, Pg. 2, Pg. 3 etc.) as intended.
Think of taking an existing 24pg Comic Book, ripping the staples out and observing each sheet. Printer’s Spread format will match exactly that.
Refer to this guide on how to read Printer Spread format, and if needed, download it and save it to reference for all future book titles of yours!
Keep a copy of this Visual Guide to help assist you with future orders!
DOWNLOAD

APPROVING Your Proofs
After reviewing your proofs, you will then confirm whether everything looks good and is approved, or if something is amiss and needs to be corrected.
Web Browser: To make a decision, click on the ‘Make Decision’ button and select ‘Proofing is Approved’ if you approve, or select ‘Changes Required for Proofing’ if you reject the Proof. If you reject the Proof, a text box will pop up for you to notate the issue you found with your proofs.
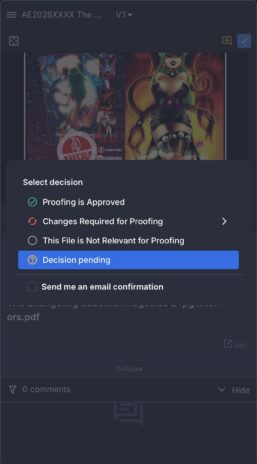
Mobile Device: To make a decision, click on the blue checkbox and select ‘Proofing is Approved’ if you approve, or select ‘Changes Required for Proofing’ if you reject the Proof. If you reject the Proof, a text box will pop up for you to notate the issue you found with your proofs.
If your proofs are rejected, we will take the information you noted in the decision and correct the affected issue concerning your Proofs. From there, we will resend the Proofs to you to ultimately approve. Once the Proofs are approved, we will begin production on your work.
Approvals are considered the final word to allow us to print the files we set up as they are, so please make sure when proofing to do so accurately. If something is caught layout-wise after production starts, it can incur an extra cost to your order for any reprinting that may need to be done.